Tri-Coat Paint- A Complete Guide

Most cars since the 1980s have two-layer paint coating technology. The basecoat layer provides the vehicle with the color, while the second clear coat layer protects the basecoat from damage. This process has allowed automotive paint jobs to last way longer than ever anticipated as paint technologies have grown since the days of Henry Ford. Introduced soon after, was tri-coat paint.

The addition of this extra mid-coat layer creates a more aesthetically pleasing finish. Tri-coat paint enhances your vehicle’s basecoat through adding more darkness, depth, or shine. Included below is all you need to know about tri-coat paint. The Auto Paint Depot has you covered for all your tri-coat paint needs. We are proud to offer tri-coat touch up paint in all sizes. All we need is the model, make, year, and paint code to accurately match your vehicle’s factory color!

What is Tri-Coat?

A vehicle that has a tri-coat paint job, simply has three layers of paint. Tri-coats were first introduced on luxury vehicles to enhance their qualities through adding more depth, glow, or darkness. When viewed under direct sunlight, the richness of the extra layer can be experienced. The layers applied in sequential order include the basecoat, mid-coat, and clear coat layer respectively.

The mid-coat is applied as a thin coating after the basecoat. Often used as a translucent color coat, the mid-coat permits light to pass through the paint job and be reflected back. Translucent means that only some light will pass through the surface, proposing it is not completely transparent. The sparkly finish on the mid-coat layer provides an extra layer of depth onto the paintjob that two layers would not normally do. Overall, the general richness of the paint job is increased as a result of adding the extra layer of paint.

Types of Tri-Coats

  • Metallic- Tends to reflect more light than a glossy finish. Adds sparkle and color depth by use of metallic particles or flakes.
  • Pearl- Uses ceramic crystals that both reflect and refract light. Light passes through more slowly, in which produces splits of different colors based on angle of viewing and sunlight amounts.
  • Candy- A high gloss, bright, and flashy finish. Candy paint uses a form of metallic paint with flakes in the basecoat. The mid-coat includes a unique candy paint shade. It is translucent, making candy paint pigment free, thus only consisting of coloring agents.

How to Apply Tri-Coat

The extra layer of paint tri-coats provide, simply adds an extra phase to the painting process. Before painting your vehicle, wash it thoroughly with specifically formulated car wash soaps and dry with a micro-fiber cloth to prevent water streaks. Cover all parts of the vehicle that are not being painted. Also, make sure the surface to be painted is sanded and primed after cleaning for the best results.

The basecoat is applied first for two to three coats. Obviously, let each coat dry before applying the next coat. Drying times are typically 15-20 minutes. Once the basecoats are completed, test the mid-coat color on a test-strip. Be certain that the mid-coat matches the desired color qualities you are looking for. The mid-coat should be translucent. If it is a match, begin to apply the mid-coat. The same drying times apply here as with the basecoat. Do not apply more than four coats as this will saturate the color properties and will no longer be a match. Finally, the clear coat layer can be applied for two to three coats.

Final Thoughts

Tri-coat paint lifts the boundaries of normal two-stage paints. The extra layer provides a more distinct hue through the use of increased darkness, sparkles, and depth. The different types of tri-coats can satisfy any car owner, based on each unique property the variations have to offer. The extra step in the painting process is a worthwhile endeavor, as the results can be breath taking.

The Auto Paint Depot is here with you every step of the way regarding your tri-coat painting needs. We offer tri-coat touch-up paint in all ranges of sizes fit for any job. Minor damage can be repaired with half and one-ounce bottles; while larger damage is covered with aerosol cans, pint, quart, and gallon variants. Contact us today regarding any questions you may have about tri-coat paint.

https://theautopaintdepot.com/?s=tri-coat&post_type=product&dgwt_wcas=1


THREE-COAT PAINT: TUTORIAL TO MASTER ITS APPLICATIONBottled BASF(OEM) Touch Up Paint for BMW Brilliant White Pearl Tricoat *U21* | eBay


25g PURPLE pearl Candy auto paint HOK HVLP SPRAY GUN GRAVITY Dupont | eBay

Tri-Coat


Automotive Primer: A Complete Guide on Why its Effective and How its Used

What is Primer?

Primer is a paint-like substance used as an undercoat for the topcoat layer of paint. It is chemically formulated to allow for the topcoat layer to adhere to the vehicle more effectively. Primer essentially prepares the car for painting. In doing so, primer prevents the topcoat layer from peeling or flaking off over time. Along with providing adhesion, primer also helps with rust prevention, filling of imperfections, sanding ease, hold out of color, and increased drying speed.

Primer is a vital component to the longevity and general success of your project. It can be used after sanding the surface, but before applying the topcoat. We are here for you at the Auto Paint Depot for all your priming needs. Our website offers a wide variety of selections when it comes to primers. After reading about the different types of primers, consider which type best fits your project. If you have any questions regarding primers, please feel free to contact us today at (631) 392-1080!

Types of Primer:

  • Epoxy– A standard base primer that is great for corrosion (rust) resistance. Does not sand as well as other options.
  • Urethane Surfacer– A two-part primer surfacer that is commonly used in conjunction with a base primer layer. This is a great option for filling imperfections, but not as sufficient in corrosion resistance.
  • Polyester– This a great choice for use as a filler. Polyester primer is the top choice for filling small scratches. Though it tends to be more brittle than epoxy and urethane primers.
  • Urethane Sealer– The best option for a quick seal. Urethane sealer is excellent for sealing a vehicle that is already in good condition. However, it does not act as a filler.
  • Enamel– A very affordable selection that is similar to epoxy. It presents a good base for bonding that is also great for preventing corrosion as well.
  • Lacquer– This primer will dry faster than all other variations. Lacquer primers help to ease the sanding process.

How to Use Primer

Before starting the painting process, clean your car using specifically formulated car wash soaps and grease removers. This will make sure that any excess debris is cleared off from the car before painting. First things first, you must prepare the surface for priming. Use tarps or paper and masking tape to cover all areas of the car you are not painting. Applying masking tape is similar to using it for moldings.

Next, begin sanding the area that will be primed. For rougher areas use a heavier grit and for smaller areas lower grit will suffice. If you encounter any imperfections such as holes or dips, use filler (putty) to fix the issue. Some primers have the ability to act as a filler, be sure to read the labeling closely. If your primer does have the filling capability, sand over the surface once again after using putty.

Be sure to sand all the way down to the bare metal by getting rid of any rust formation. Make certain the surface is smooth and free of rust after sanding thoroughly. Let the car dry for a couple hours before applying the primer. Drying times vary based on weather conditions. Allotting time for proper drying improves the effectiveness of the primer’s adhesion.

If you are painting a large portion of the car, we recommend using a spray gun. When applying the primer, be sure to accurately apply it evenly across the desired surface. Even application prevents build-up and excess paint from bubbling over. Allow the primer to dry after beginning the next two coats. After the primer is dry, use fine-grit sandpaper to smooth out any mounds or dips that have occurred as a result of the primer. Fine-grit sandpaper will not remove the primer that was just applied. Now your project is ready for the basecoat layer.

Additional Materials Needed for Priming

  • Tarp/paper– used to cover surfaces not being painted.
  • Masking tape– adhesive used to tape tarp/paper.
  • Cleaning supplies– car wash soap, micro-fiber cloth, brush
  • Sandpaper- heavy and fine grit to sand desired surface.
  • Putty– used to fill imperfections (if primer does have filler ability)
  • Goggles– eye protection from potential splashing of paint
  • Dusk mask– breathing protection from inhaling harsh chemicals

Final Thoughts

As you can see, the use of primer does not go unnoticed. Its benefits are too much to pass up when painting your car. Be sure to determine what type of primer your project needs. Selecting the best primer for your project will contribute to the end result having increased durability. Take a look at the primers we offer on our website. We are proud to supply a wide range of primers to fit any job. Good luck with your project!

https://theautopaintdepot.com/?s=primer&post_type=product&dgwt_wcas=1


How to Do a Backyard Auto Primer Job on a BudgetPainting a car at home | Part 2 | Articles | Grassroots Motorsports


Revamp Your Car While Also on a Budget: DIY Tips and Tricks for the Car Enthusiast from the Auto Paint Depot

Applying cosmetic and mechanical upgrades to your car can be a costly endeavor. Fortunately, there are means to give your car a facelift, while also adhering to your personal budget. The common car enthusiast can save money by taking the time to learn and complete various tasks that can immensely improve the look of your car. Gaining the knowledge of how to fix your car on your own will save you costly trips to the body shop. The Auto Paint Depot has all the automotive supplies needed for you to make your car look better than ever at affordable prices. Follow these expert tips below on how to revamp your ride on a budget for the DIY car enthusiast.

Deep Cleaning and Detailing

Why take your car to a body shop or car wash to be cleaned and detailed, when you can get the same professional results as DIYer for a fraction of the cost? Having a weekly routine of washing your car is vital to keeping it looking great at all times. Our affordable specifically formulated car wash soaps and waxes will keep your car looking fresh without having to pay excessive prices. Vacuuming the interior of your car on your own can also be a money saver. A common household vacuum or shop vacuum will do the trick in cleaning the carpets and seats.

In addition, cleaning the interior of your car’s surfaces can be done in house by making one small purchase. Simply use automotive interior wipes to deeply clean the interior surfaces of the vehicle that cannot be reached with a vacuum.

Wiping down the center console and dashboard may seem like a small step but will contribute to making your car feel fresh out of the dealer. Consider investing in new floor mats and car seat covers. This worthwhile purchase will help your car stay cleaner longer and will reduce the chance of messiness and permanent damage.

Try using the professional grade car wax that we use on your car today. You will be pleased with the professional detailed look the car wax we supply will give your car. Remember to apply wax once every three months. In order not to oversaturate your car’s base paint layer. Take advantage of our automotive cleaning supplies to produce a professional finish from browsing our detailing and polishing section of the website.

Fix Small Scratches and Chips

Small imperfections and damage on your car are tough to notice on a day-to-day basis. Take the necessary time to thoroughly examine the body of your car to notice any small scratches and chips that could go unnoticed. Painting over small scratches and chips incorrectly will damage the final outcome of your DIY project. This will directly lead to spending more money to address the mistake.

Do not defeat the purpose of adhering to your budget. Therefore, consider using our touch-up paint bottles to address this issue on a budget. Our half-ounce and one-ounce bottles are perfect for repairing minor damage. Be informed to choose the correct color for your car by referencing the paint code in the driver’s side door jam.

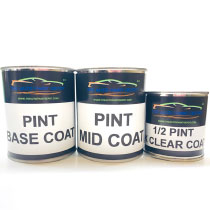
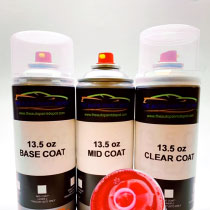
When fixing small scratches and chips be sure to sand the area with the correct level grit of sandpaper. Next, use primer after sanding. Then, apply the base coat paint to your car. Apply three coats of base coat, while waiting fifteen-minute intervals in between coats ensuring they dry properly. Lastly, apply the clear coat to the desired area for at least three coats. Allow each clear coat layer to dry before applying the next layer. Following all of these steps will ensure that your DIY project will yield a professional result.

If you have any questions on how to do your DIY project, please call the shop at (631) 392-1080. We are with you every step of the way and can offer expert advice and recommendations when it comes to automotive paint and supplies. These aforementioned products can be purchased from our website directly for competitive prices.
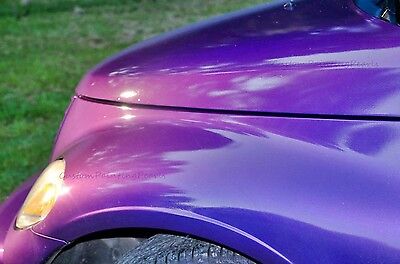
Fresh Paint Job

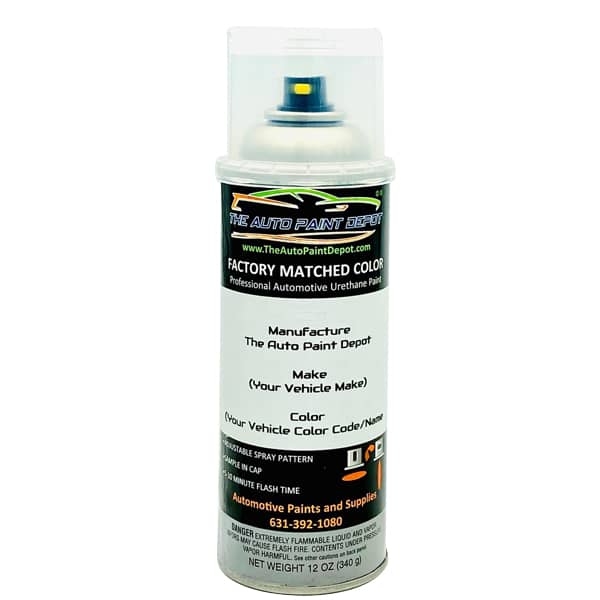
Regularly when considering a fresh coat of paint for your car, the thought of the cost can be daunting. Body shops can often charge large fees for the full paint job of a vehicle. However, we at the Auto Paint Depot are here for all the car enthusiasts that are looking for great deals to supply all DIY needs. In general, when painting substantial portions of your car, we recommend purchasing our aerosol cans, pints, quarts, and gallons automotive paint products. In order to achieve the best results, a spray gun must be used. Be sure to follow all the directions we provide on how to use the activator product when painting your car.

The first step is to clean the car thoroughly before beginning the painting process. Wash your car with specially formulated car wash soap, rinse thoroughly, and dry your car using micro-fiber cloths to prevent water spots. One your car is clean, cover any parts of the vehicle that are not going to be painted. We recommend using cloths and tape to protect areas not being painted.

Begin sanding the area with the correct level of grit sandpaper. This process strips the current layer of paint down to the bare metal. In doing so, sanding removes the layer of rust produced and further helps to make the new layer adhere to the body better. Next, apply two to three coats of primer to the desired area. The use of primer is a vital step to the overall effectiveness of your DIY project. Primer acts as a bonding agent to aid in the paint holding more effectively to the body of the car.

Following the primer, begin applying the basecoat. While using the spray-gun, be sure to be 6-8 inches away from the body and apply the paint in even layers to achieve the best results. Repeat this process for the three coats, allowing each layer to dry for 20 minutes in between. The last step and unironically the last line of defense for your new paint job is applying clear coat. This invisible layer shield helps protect from debris and UV radiation, while also adding an aesthetically pleasing gloss finish to your car. Apply two to three coats and let each layer dry before applying the next.

All of the products needed for this DIY project can be found at the Auto Paint Depot. Please contact us with any further questions and concerns regarding your project. Also, watch our “How-To” videos on our website for a more visual representation.

Repair Windshield

Debris from the roads you drive on can strike your windshield and produce a scratch. Pesky pebbles and rocks are the main culprit for this occurrence. Once your windshield is cracked, you must repair it as soon as possible. A scratched windshield can limit your visibility when driving but can also grow in size over time. The changing temperatures from hot to cold can cause the windshield glass to expand in size, thus making visibility even more difficult.

More often than not, your insurance will cover the cost of replacing the windshield. Or if you are a DIYer, you can purchase a windshield repair kit and fix it on your own. However, we recommend hiring a professional as windshield visibility is crucial to your safety and the safety of others on the roads. Your insurance covering the costs will allow to spend more of your budget on other means.
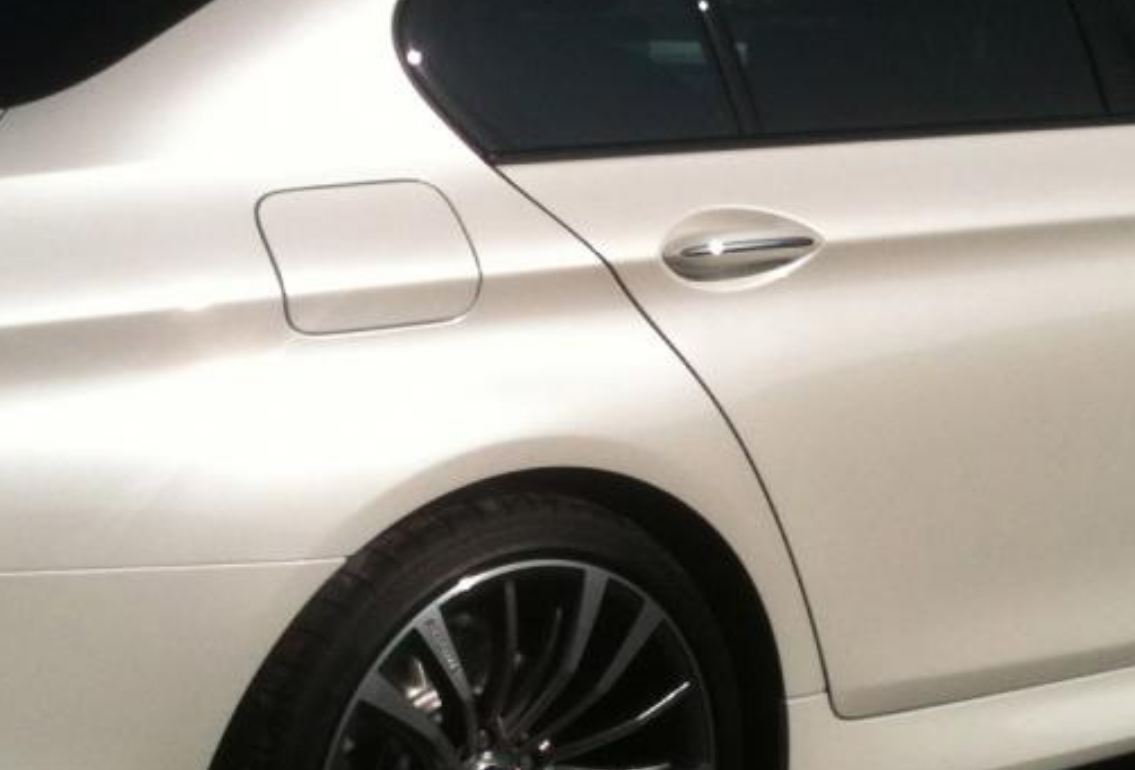
Tint Windows

Tinting your car’s windows contributes to the overall mystique your DIY project is striving to accomplish. Window tint will begin to peel and fade over time. Replacing window tint as a DIYer can be attained without having to visit auto shops for astronomical prices. Using a couple of simple tools and techniques, window-tinting can be done as a DIYer on a budget. However, make sure to adhere to the laws of your state for window-tinting percentages.

Different states have the ability to create their own legislation to the percentage of window tint they allow. For example, New York State’s law for window tint prohibits tints of more than 30% for both front and back side windows. Meaning the tint must allow for more than 70% of light to reflect in. Be aware of these laws, as they vary from state to state.

Tires and Rims

It is recommended by automotive professionals that you replace your tires every three to five years. The lifespan of your tires varies based on weather conditions and amount of use. Generally, a tire with little to no tread on it must be replaced as it is a safety hazard to the driver. Old tires that lack tread will increase the chances of an accident as the tires will not grip the road as well as they are intended to.

Look for exclusive deals when on a budget when purchasing tires. The off-peak time when tires are at lower costs is the spring and fall. P Many places of business offer deals if you buy all four tires at once, in which case can save you more money on your budget.

Furthermore, rims with minor scratches on them can be fixed by the DIYer on a budget. Scuff marks are produced on car rims by rubbing up against curbs, thus the common term “curbed rims.” Be aware of your surroundings and parallel park carefully to decrease the chance of this happening. If your rims are “curbed” you can fix them on your own, with the help of the Auto Paint Depot.

When repairing rims, the same common process is conducted when painting the body. Repair your rims by cleaning the area first. Next, use sandpaper to buff out and smooth the minor scratches. Applying primer readies the rim to bond more effectively to the spray paint. Obtain the rim spray paint color of your choice and apply it to the rim. Follow the same amount of coats and time needed in between as if you were painting the body. Finally, apply clear coat to protect the paint layer and produce a gloss finish.


budget


https://theautopaintdepot.com/shop/detailing-and-polishing/


The Ultimate Guide to Automotive Paint Finishes

An In-Depth Guide to Choosing the Right Finish for Your Vehicle


Why Gloss Reigns Supreme

Gloss finishes have long been the hallmark of automotive elegance. This type of finish delivers a classic look that car enthusiasts have cherished for decades. The reflection produced by gloss paints under sunlight is clean and sharp, ensuring that vehicles present a radiant appearance, shimmering with clarity and brilliance.


Additionally, gloss doesn’t just add to the aesthetics but also ensures durability. These finishes are known for their robust protective qualities against environmental elements like UV rays, rain, and dust. At The Auto Paint Depot, our meticulously crafted range of gloss finishes is designed to combine both style and substance, making sure cars look brand new and stay protected longer.


Embracing the Understated Elegance of Matte

In recent years, matte paint finishes have surged in popularity, distinguishing vehicles with an understated, yet powerful presence. The non-reflective nature of matte grants cars a distinctive look, creating an aura of elegance and modern sophistication. For many, matte is the embodiment of a fresh and contemporary automotive style, devoid of the typical shine most vehicles exhibit.


However, this elegance comes with its set of challenges. Matte finishes demand careful maintenance, as blemishes or imperfections can be more pronounced. To counter this, The Auto Paint Depot offers a premium range of matte finishes, ensuring uniformity and top-tier quality. For the discerning car owner who desires subtlety over shine, matte finishes from our collection promise unmatched beauty.


Shimmering Beauty on Wheels

When vehicles glisten with a unique depth under the sun, there’s a high likelihood they’re adorned with a metallic finish. The integration of tiny metal flakes in the paint gives vehicles a rich and dynamic appearance, combining the traditional shine of gloss with the mystique of shimmering particles. It’s this blend that offers cars a multi-dimensional look, captivating at every angle.


Beyond the visual charm, metallic finishes are also practical. The reflective metal flakes can effectively mask minor scratches or dings, making wear and tear less noticeable. For those who want their vehicles to stand out while also benefiting from this practical advantage, The Auto Paint Depot’s collection of metallic paints offers diverse choices that mesmerize and protect.


Pearlescent Finishes: When Cars Meet Opulence

Pearlescent paints are the epitome of automotive extravagance. These finishes exude luxury, setting vehicles apart in a most spectacular way. Unlike conventional paints, pearlescent varieties contain ceramic crystals that interact differently with light. Depending on one’s perspective, a pearlescent-coated car can display a spectrum of colors, offering a visual treat that’s both dynamic and exquisite.

The true magic of pearlescent finishes lies in their ability to morph and change. As light conditions vary and as observers move, the paint reveals different hues, akin to the shimmer of a pearl. At The Auto Paint Depot, our selection of pearlescent finishes is the intersection of art and engineering. For those with a penchant for luxury and a desire for their vehicles to be genuine showstoppers, our range offers nothing short of automotive opulence.


Clear Coats: The Invisible Shield of Brilliance

Often underrated but immensely crucial, clear coats are the unsung heroes of automotive paint finishes. Acting as a transparent armor, they envelop the chosen paint, safeguarding it from potential damage. The significance of a clear coat is evident in its dual functionality: it enhances the depth and vibrancy of the underlying paint while also offering a robust protective shield against environmental challenges like UV rays and pollutants.


While many might be swayed primarily by color choices, the decision on the clear coat should never be an afterthought. A high-grade clear coat doesn’t just maintain the vehicle’s aesthetic appeal, it prolongs it. Whether you’re gravitating towards a matte, metallic, or gloss finish, The Auto Paint Depot’s collection of top-tier clear coats ensures your vehicle remains as captivating as the day it was painted.


Crafting Your Car’s Personality

The journey of selecting the perfect paint finish is multifaceted. It’s more than just picking a color or sheen; it’s a reflection of the owner’s personality and preferences. The paint finish on a car can communicate elegance, ruggedness, subtlety, or flamboyance. But beyond personal aesthetics, practical considerations come into play, such as the vehicle’s primary use, local climate, and frequency of maintenance.


At The Auto Paint Depot, we understand that such decisions can be overwhelming. That’s why we’re dedicated to guiding our clients through every step of this colorful voyage. Our experts are on hand to offer insights, answer queries, and provide recommendations. So, whether you’re looking for a finish that makes a bold statement or one that exudes understated grace, we ensure your vehicle is not only visually appealing but also primed to brave the elements and stand the test of time.


Shiny Car Pictures | Download Free Images on Unsplash


Shopping Cart